Use the aerodynamic equations, workshop plan dimensions, and field troubleshooting record below to match a kite tail, its length, and its attachment point to your single-line kite.
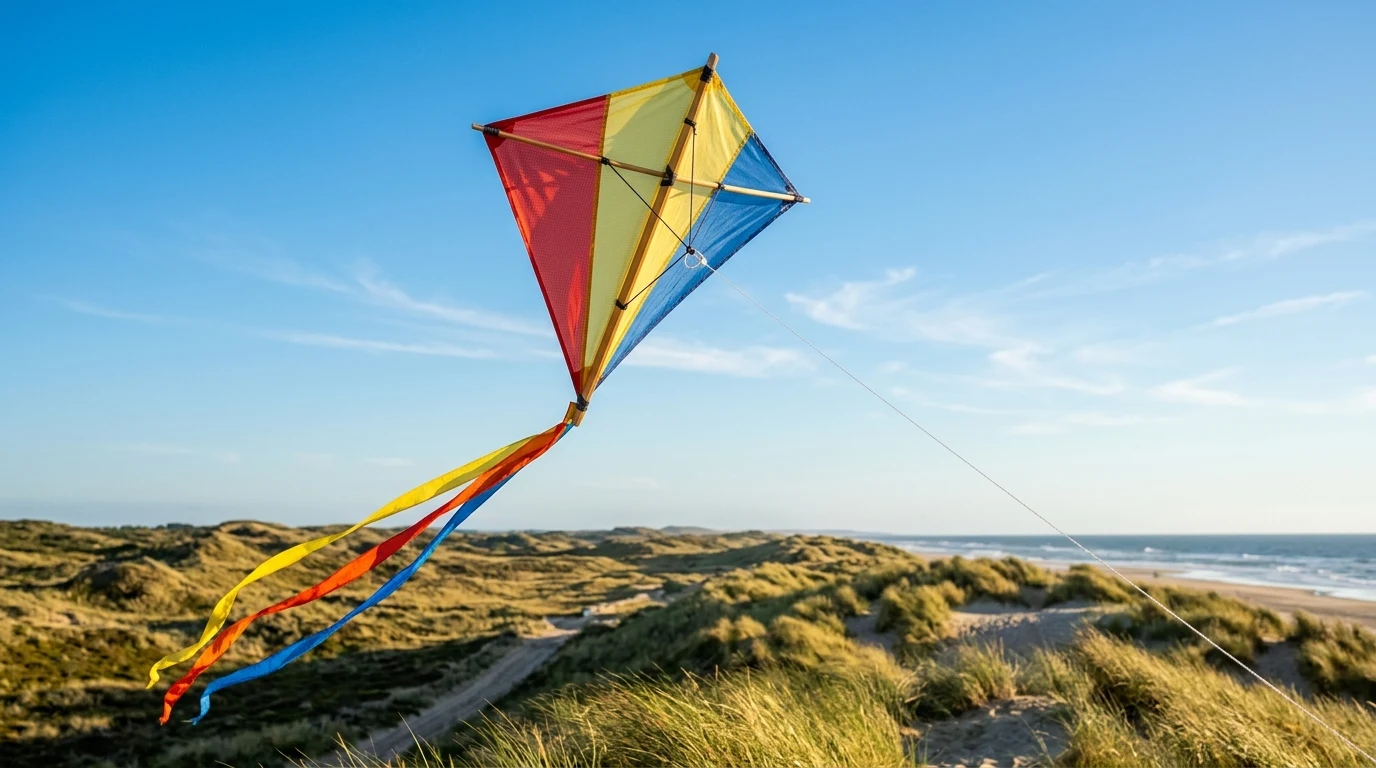
In the American Kitefliers Association’s How to Fly a Kite manual, tails help stabilize kites, although some kites are designed to be stable without a tail, supporting the saying among Japanese kite makers that a good kite needs no tail; tails may also be added for artistic or visual effect. In the same American Kitefliers Association manual, tails stabilize kites in heavier winds by creating drag below and in-line with the kite (often attached at the bottom of the spine) to compensate for wind or design instability; the lighter the tail, the better because tails should add drag, not weight. In NASA Glenn Research Center’s Interactive KiteModeler manual, the Bridle length and Knot distance variables set the trim angle, knot location has a large effect on stability because the kite pivots about the knot, and the length of the Tail affects stability and trim by shifting the Cg. Compare the kite-family rules, workshop tail plans, and commercial tail specifications below before cutting or clipping on a tail.
| Single-line kite family or named model | Documented tail requirement and stability setup |
|---|---|
| Flat rigid single-line kites | In the American Kitefliers Association’s How to Fly a Kite manual, flat kites are flat and rigid in flight (not bent by the wind) and usually require one or more tails, vents, or special construction to achieve an even spilling of air for stability. |
| Bowed Eddy diamond kites | In the American Kitefliers Association’s How to Fly a Kite manual, bowed kites face the wind with a curve (bowed by construction or by the wind (shortening the back tension line allows the kite to bow)) that creates dihedral for stability, so bowed kites like Eddys seldom need tails. |
| Rokkaku six-cornered kites | In the American Kitefliers Association’s How to Fly a Kite manual, Rokkaku six-cornered Japanese kites vary from about 4’ to 7’ in size, usually have a four-legged bridle, and are bowed by two tension lines so they fly well without tails. |
| Delta single-line kites | In Into The Wind’s traditional kites guide, for delta kites, if the delta pulls hard and loops or dives because the wind is too strong, adding tails makes it easier to launch and fly in gusty winds; add tails symmetrically at the center or equally to each side; don’t attach tails to the keel. |
| Dragon, diamond, and box kites | In Into The Wind’s traditional kites guide, on dragon, diamond, and box kites, mark the factory bridle setting before moving the bridle loop up 1/2“ for strong winds or down for light winds; tails are needed for most diamond kites, whereas box kites prefer steady winds. |
| Airfoil and sled kites | In Into The Wind’s traditional kites guide, for airfoil and sled kites, attach your line to the bridle loop; bridle adjustment is not recommended with airfoils; instead, match the tail to the wind—a streamer can be fine in moderate winds, but you may need a drogue in strong winds. |
| Prism Sinewave parafoil kite | On Prism Designs’ Sinewave product page, the all-fabric Prism Sinewave single-line parafoil (33 x 27 in assembled size, rated for 8-25 mph / 13-40 kph) includes a matching 20’ detachable tail that can be unclipped in light wind to reduce drag so the kite flies in less wind. |
How Kite Tail Drag and Bridle-Point Torque Govern Single-Line Kite Stability
Review the documented forces and torques below when checking single line kite stability, or see our guide to single-line kite types for an overview of airframe geometry.
In NASA Glenn Research Center’s Forces on a Kite reference, on a kite in flight, the weight W always acts from the center of gravity toward the center of the earth. In the same NASA Glenn reference, the aerodynamic force on a kite is usually broken into lift L, which acts perpendicular to the wind, and drag D, which acts in the direction of the wind, acting through the center of pressure. In that NASA Glenn reference, the tension in the control line acts through the bridle point where the line attaches to the kite bridle and is broken into vertical pull Pv and horizontal pull Ph.
Review the static equilibrium and sail-loading relationships below:
- In NASA Glenn Research Center’s Forces on a Kite reference, when a kite is in stable flight, the vertical pull plus weight minus lift equals zero (Pv + W - L = 0) and the horizontal pull minus drag equals zero (Ph - D = 0).
- In the same NASA Glenn reference, near the bridle point, the control line is inclined at the bridle angle b, whose tangent equals vertical pull divided by horizontal pull (tan b = Pv / Ph).
- In that NASA Glenn reference, when a gust of wind strikes a kite, lift and drag increase; the kite moves vertically because lift exceeds weight and vertical pull, and line tension increases because of increased drag.
- In NASA Glenn Research Center’s Torques on a Kite reference, since kite weight is constant, the difference between lift and weight indicates how well the kite flies: with greater lift the kite climbs faster, flies higher, and is able to lift more string, whereas with less lift it climbs slowly or maybe not at all.
- In the American Kitefliers Association’s Kites in the Classroom manual, sail loading (sail_load = weight / area) is the ratio of the weight of a kite to its area and indicates how well the kite will fly in light winds.
Compare the bridle-point torque and center-of-pressure equations below:
- In NASA Glenn Research Center’s Torques on a Kite reference, a kite in flight does not rotate about its center of gravity because it is pinned by the bridle to the control line; instead, it rotates about the bridle point where the line attaches to the bridle.
- In the same NASA Glenn reference, kite weight produces a clockwise torque TW about the bridle point equal to the magnitude of the weight W times the perpendicular distance g from the bridle point to the center of gravity (TW = W * g).
- In that NASA Glenn reference, aerodynamic force produces a counterclockwise torque TF about the bridle point equal to the magnitude of the aerodynamic force F times the perpendicular distance p from the bridle point to the center of pressure (TF = F * p).
- In the same NASA Glenn reference, in trimmed flight equilibrium, the weight torque and aerodynamic torque are balanced (W * g = F * p) and there is no rotation of the kite about the bridle point.
- In that NASA Glenn reference, if the aerodynamic torque does not equal the weight torque as a kite rotates, the kite continues to rotate under the unequal torques and may continually rotate if the torques never equalize.
- In NASA Glenn Research Center’s Kite Balance and Stability reference, the net clockwise torque T about the bridle point is T = - L * cos(a) * (yb - cp) - L * sin(a) * xb - D * sin(a) * (yb - cp) + D * cos(a) * xb + W * cos(a) * (yb - cg) + W * sin(a) * xb, where a is angle of attack, xb and yb are bridle-point coordinates, cp is center of pressure, and cg is center of gravity.
- In the same NASA Glenn stability reference, in turbulent air, if net torque increases when angle of attack increases slightly, the kite is in an unstable condition where increasing torque drives further angle-of-attack increases until the kite rotates out of control.
- In that NASA Glenn stability reference, for a balanced, stable kite design, a small increase in angle of attack from the balance point causes a negative restoring torque, meaning the torque versus angle-of-attack plot must cross the angle-of-attack axis with a negative slope.
- In NASA Glenn Research Center’s Kite Center of Pressure reference, the center of pressure is the average location of the aerodynamic forces acting on an object, and determining kite stability and trim requires knowing both the magnitude of the aerodynamic forces and the location of the center of pressure.
- In the same NASA Glenn Center of Pressure reference, for a symmetric flat-plate airfoil, the aerodynamic moment is zero and the aerodynamic center is located 1/4 of the chord length back from the leading edge.
Compare the aerodynamic drag and trim definitions below:
- In NASA Glenn Research Center’s Kite Drag Equations reference, aerodynamic drag D on a kite equals the drag coefficient Cd times projected surface area A times air density r times half the square of wind velocity V (D = Cd * A * r * .5 * V^2).
- In the same NASA Glenn drag reference, standard sea-level air density r is 1.229 kg/m^3 or .00237 slug/ft^3.
- In that NASA Glenn drag reference, for a thin flat plate at a low angle of attack a, the flat-plate drag coefficient Cdo equals 1.28 times the sine of the angle a (Cdo = 1.28 * sin(a)).
- In the American Kitefliers Association’s How to Fly a Kite glossary, drag is defined as the force created by friction between the airflow and a sail, flying line, tail, and spars, and trim is the adjustment of the bridle, as well as shape and weight distribution, so the kite flies efficiently (for example, by increasing or decreasing the bow or dihedral, or by adding tail or weight).
- Under the American Kitefliers Association’s Kites in the Classroom glossary, drag is the total air resistance during flight, a tail with a rough surface provides more drag, and a tail attaches to the trailing edge of a kite to add stability by creating drag (not by adding weight).
- In the same Kites in the Classroom manual, a longer tail will often help stabilize a kite by adding drag below the kite without adding much weight, keeping the kite pointed into the wind; successively shortening a required tail makes the kite unstable.
Roll, Pitch, Yaw, and Dihedral: Which Single-Line Kites Need a Kite Tail
For a side-by-side look at how deltas, parafoils, box kites, diamonds, and dragons compare across wind ranges, read our single-line kite architecture comparison.
In the American Kitefliers Association’s Kites in the Classroom manual, on a kite, the dihedral is the bow or ‘V’ shape with a typical dihedral angle of about 30 degrees (15 degrees on each side); when the kite rolls left or right, the wind exerts greater force on the side flattest to the wind, pushing it back into equilibrium for roll and yaw stability. In the same Kites in the Classroom manual, in AKA’s Roll vs. Pitch vs. Yaw framework: roll (twisting, fluttering, or rolling) is usually caused by left-right asymmetry or an off-center bridle/tow point; pitch (angle of attack) is adjusted by moving the tow point up or down on the bridle—in light winds the kite should have a large angle of attack and in strong winds the angle of attack should be reduced; and yaw (turning or spinning left or right) is corrected by lengthening the tail to add drag or bowing the kite to increase dihedral.
Compare the documented stability setups across single-line kite families below:
- In the American Kitefliers Association’s How to Fly a Kite manual, in the early 1900s, William Eddy modified a diamond-shaped, two-stick kite from the Malaysian Peninsula by bowing the horizontal spar to create a dihedral (flexed wing position) that stabilizes tailless Eddy kites.
- In the same How to Fly a Kite manual, flat kites are flat and rigid in flight (not bent by the wind) and usually require one or more tails, vents, or special construction to achieve an even spilling of air for stability.
- In that How to Fly a Kite manual, bowed kites face the wind with a curve (bowed by construction or by the wind (shortening the back tension line allows the kite to bow)) that creates dihedral for stability, so bowed kites like Eddys seldom need tails.
- In the same How to Fly a Kite manual, Rokkaku six-cornered Japanese kites vary from about 4’ to 7’ in size, usually have a four-legged bridle, and are bowed by two tension lines so they fly well without tails.
- In that How to Fly a Kite manual, a delta kite has a keel that holds the spine straight and rigid, and this triangular-shaped delta can flex and automatically adjust to changes in wind force and direction.
- Under Into The Wind’s traditional kites guide, for delta kites, if the delta pulls hard and loops or dives because the wind is too strong, adding tails makes it easier to launch and fly in gusty winds; add tails symmetrically at the center or equally to each side; don’t attach tails to the keel.
- In the American Kitefliers Association’s How to Fly a Kite manual, Indian fighter kites are diamond-shaped single-line kites with a two- or three-point bridle: pulling on the line flexes the spreader so the kite flies in the direction it is pointed, while releasing tension returns the kite to a flat, unstable shape that causes it to spin.
How to Make a Kite Tail: Materials, Configurations, and Workshop Plans
Review the documented materials and workshop plans below when learning how to make a kite tail.
Under the American Kitefliers Association’s How to Fly a Kite manual, possible kite tail configurations include thin, thick, multiple, u-shaped, balanced, Y-shaped, twisting, drogues, and combinations. Under the American Kitefliers Association’s Kites in the Classroom materials guide, rolls of non-sticky plastic surveyor’s tape (flagging tape) from hardware stores, crepe paper from party supply stores, and plastic trash bags are listed as materials for making kite sails and tails. Under the American Kitefliers Association’s How to Fly a Kite manual, Launch Trouble-Shooting section, a kite may fail to rise if it has too much drag because of too much tail or a tail that is too heavy; for stronger winds, try a tail 7 times the length of the kite to start, and strips of plastic garbage bags work well when improvising.

The table below lists the published tail dimensions, materials, and wind ranges from the American Kitefliers Association’s Kites in the Classroom workshop plans.
| Workshop kite plan | Published sail, spar, wind range, and tail specification |
|---|---|
| Allison Sled Kite plan | The Allison Sled Kite plan (rated for 4mph to 18mph winds, with a 24“ x 30“ kitchen plastic trash bag sail, two 16“ x 1/8“ wooden dowels, and a 48“ bridle) specifies optional 1-1/2“ wide tails cut from remaining bag scraps and taped to the bottom at each spar. |
| Workshop Eddy Kite plan | The workshop Eddy Kite plan (rated for 4mph to 18mph winds, 2’ tall by 2’ wide with a 24“ spine and a 24“ spreader bowed to a 3“ center dihedral offset) specifies a 7’ tail made from surveyor’s flagging tape or 1“ wide plastic strips tied to the bottom of the spine. |
| Hosking Tadpole Kite plan | The Hosking Tadpole Kite plan (rated for 4mph to 10mph winds, folded from an 8-1/2“ x 11“ bond paper sheet with no spars and a 36“ bridle) specifies three 1-1/4“ wide strips of 2 mil plastic trash bag or surveyor’s flagging tape taped together to create a 6’ tail attached with a 12“ tail line. |
| Japanese Ladybug and Picnic Plate Kite plans | The Japanese Ladybug Kite plan (4mph to 10mph, 10“ x 12“ tissue paper sail, 12“ bamboo spine, 11“ bamboo spreader bowed 2 inches) uses three 3/4“ x 7’ crepe paper strips as a tail, while the 9“ Styrofoam Picnic Plate Kite plan (4mph to 16mph, no spars or bridle) uses an 18’ x 2“ plastic strip or surveyor’s flagging tape tail. |
| Hexagon and Box Kite plans | The Hexagon Kite plan (8mph to 18mph, three 36“ x 3/16“ dowels) uses four 1“ x 15’ surveyor’s flagging tape or crepe paper tails, whereas the Box Kite plan (13mph to 31mph, 24“ x 30“ trash bag and four 24“ x 3/16“ side spars) uses no tail. |
Commercial Ribbon Tails, Inflatable Tube Tails, and Detachable Parafoil Tails
Compare the published manufacturer specifications for flat ripstop ribbons, inflatable tube tails, and frameless parafoil tails below:
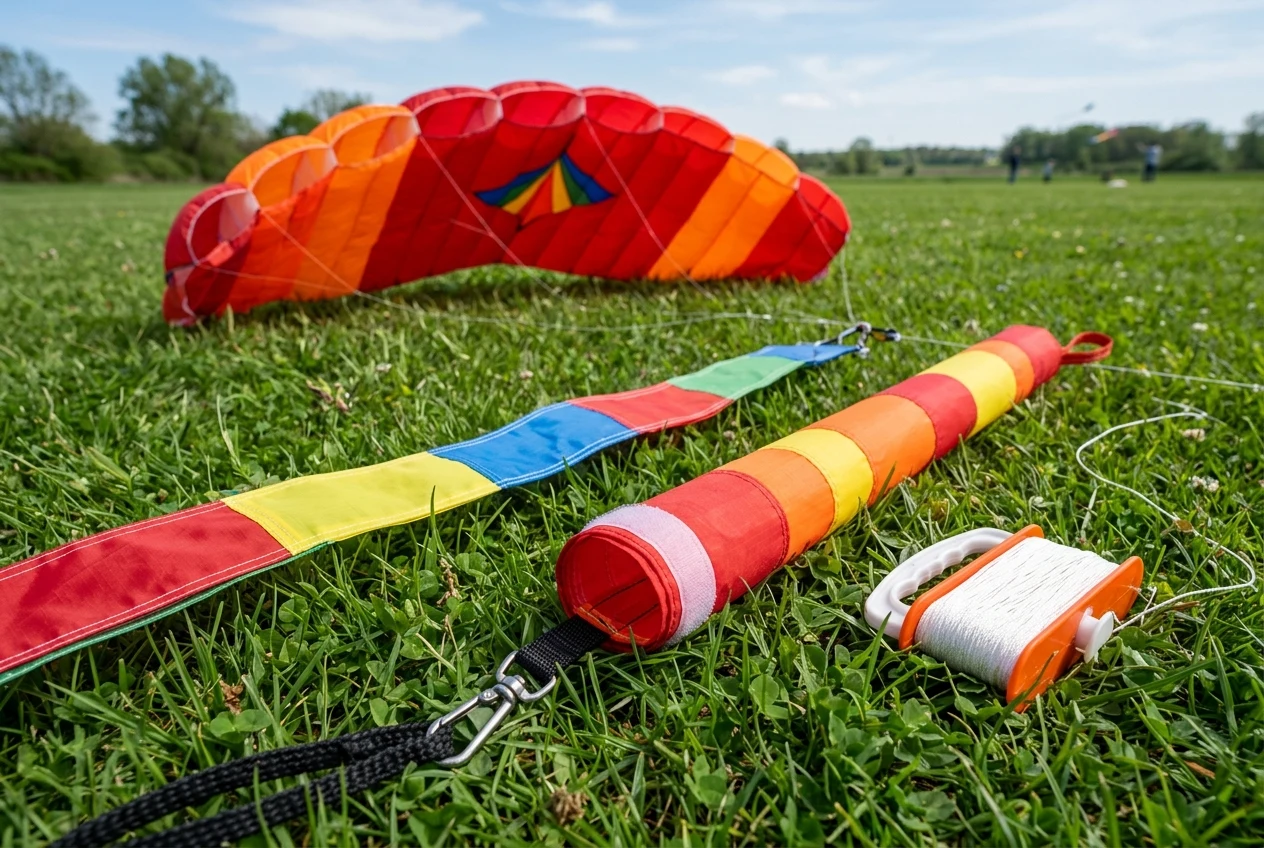
- On Prism Designs’ Aurora Ribbon Tail specification page, the Prism Aurora 20’ Ribbon Tail is ideal for smaller kites or lighter winds, measures 20’ long by 1.5“ wide with full-length stitched edges, adds a little drag to slow dual-line kites down, and improves stability for single-line kites in fluky winds.
- On Prism Designs’ Ribbon Tail specification page, the Prism 40’ ripstop nylon Ribbon Tail slows kites down for more control in strong winds and works for both dual and single-line kites when winds are not strong enough to lift a large tube tail.
- On Prism Designs’ Infrared Tube Tail specification page, Prism Infrared Tube Tails inflate in flight, attach via a swivel clip to the spine, wingtips, or flying line, can be joined end to end, and include a Velcro closure at the tip to drain sand and air; the 20-footer suits single-line kites, line laundry, or small dual-line kites, while the 75-footer suits medium to full-sized dual-line kites.
- On Prism Designs’ Sinewave specification page, the all-fabric Prism Sinewave single-line parafoil (33 x 27 in assembled size, rated for 8-25 mph / 13-40 kph) includes a matching 20’ detachable tail that can be unclipped in light wind to reduce drag so the kite flies in less wind.
- On the same Prism Designs Sinewave specification page, the Prism Sinewave single-line parafoil includes a winder with 200’ x 50 lbs polyester flying line (61 m x 22.5 kg).
- In Into The Wind’s traditional kites guide, for airfoil and sled kites, attach your line to the bridle loop; bridle adjustment is not recommended with airfoils; instead, match the tail to the wind—a streamer can be fine in moderate winds, but you may need a drogue in strong winds.
Single-Line Stability Troubleshooting and Kite Tail Diagnostic Record
Before moving a bridle knot or cutting a tail shorter on the field, verify how your bridle is rigged with our guide to identifying a kite bridle setup before tuning, and review our kite launch position and wind-window guide for launch and retrieval handling.
Follow these documented diagnostic rules when checking a single-line kite on the field:
- Three primary field adjustments: The American Kitefliers Association identifies three key on-field flight corrections: (1) changing the tow point on the bridle, (2) increasing or decreasing the kite’s dihedral by bowing, or (3) increasing or decreasing the drag created by tails or drogues.
- Tail length and symmetric placement check: In the American Kitefliers Association’s Kites in the Classroom manual, Kite Trouble Shooting section, depending on kite style, a tail as much as seven times the length of the kite may be needed; if a kite won’t fly, verify that tails are centered at the bottom or equally placed on the sides.
- Spinning, snaking, or wing-lifting roll: If a single-line kite spins in circles, snakes from side to side, or flies to one side, check lateral balance at the tow point and add tape to the lighter side, move the tow point toward the bottom, or add tails; if it rolls so one wing lifts and the other lowers, move the tow point toward the top, add longer or additional tails, or bow the spreader for more dihedral.
- Overpowered looping and diving in heavy wind: When a kite rises into stronger or gusty wind and becomes overpowered, it spins, loops, and dives, which may require adding a longer tail and moving the bridle tow point toward the top of the kite 1/4“ at a time.
- Launch angle-of-attack adjustments: In launch troubleshooting, if a kite will not rise and the angle of attack needs adjustment, move the bridle point slightly higher if it does not climb or slightly lower to steady the kite, moving it only one quarter of an inch at a time.
- Tail-first sinking versus head-first spinning: According to the American Kitefliers Association online guide, if a single-line kite sinks tail first, there might not be enough wind, whereas if it comes down head first or spins, there might be too much wind; adjustable bridles should be moved higher in higher winds and lower in lower winds by no more than 1/2“ at a time.
- Hard line pull versus light-wind wobble: Into The Wind states that if a kite loops and dives while pulling hard on the line and letting out line steadies it only temporarily, the wind is too strong and a tail should be added for more drag (not weight); if the kite wobbles and fails to climb unless line is pulled in, the wind is too light.
- Marking factory bridle settings on framed kites: On dragon, diamond, and box kites, mark the factory bridle setting before moving the bridle loop up 1/2“ for strong winds or down for light winds; tails are needed for most diamond kites, whereas box kites prefer steady winds.
- Retrieval apparent-wind increase: When a kite is retrieved under moderate tension, taking in kite line adds 1 to 3 MPH to the wind speed acting on the kite, which can cause the kite to overfly; if you fail to correct an overfly, the kite may dive and crash.
Copy this diagnostic table to record your kite setup, tail configuration, and single-variable field changes:
| Diagnostic item | Observation to check | Your field notes |
|---|---|---|
| Kite family and frame geometry | Flat rigid, bowed dihedral, delta with keel, cellular box, or soft airfoil/sled | ____________________ |
| Lateral balance at tow point | Left-right balance when held at the bridle point; tape added to lighter wing | ____________________ |
| Tail material and surface texture | Flagging tape, plastic bag strip, crepe paper, stitched ripstop ribbon, tube, or drogue | ____________________ |
| Tail length and width | Measured length and strip width compared with plan or maker specification | ____________________ |
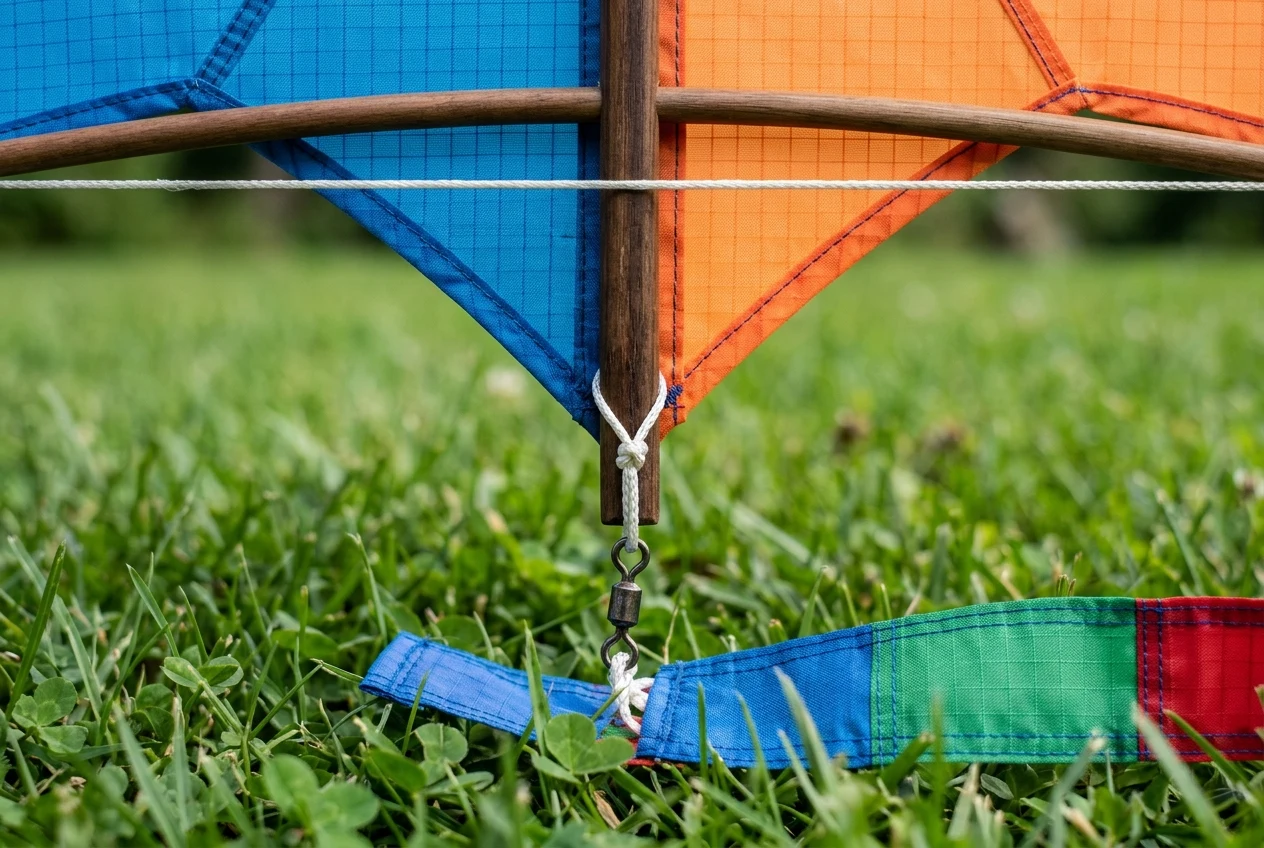
| Attachment location and symmetry | Centered at bottom of spine or paired equally on both sides; don’t attach to a delta keel | ____________________ |
| Flight symptom observed | Tail-first sink, head-first spin, hard-pull looping, or one wing lifting in roll | ____________________ |
| Bridle or dihedral change logged | Marked factory tow-point setting, direction moved, or bow tension line adjustment | ____________________ |
| Result after tail adjustment | Steady climb and heading alignment versus excess drag in light wind | ____________________ |
Browse all guides in the Kite Types category or return to the main blog index for more single-line and dual-line technical references.
Sources
- NASA Glenn Research Center — Forces on a Kite, Beginner’s Guide to Aeronautics
- NASA Glenn Research Center — Torques on a Kite, Beginner’s Guide to Aeronautics
- NASA Glenn Research Center — Kite Balance and Stability, Beginner’s Guide to Aeronautics
- NASA Glenn Research Center — Kite Drag Equations, Beginner’s Guide to Aeronautics
- NASA Glenn Research Center — Kite Center of Pressure, Beginner’s Guide to Aeronautics
- NASA Glenn Research Center — Interactive KiteModeler User Manual
- American Kitefliers Association — How to Fly a Kite, Revised Edition by Glenn Davison
- American Kitefliers Association — Kites in the Classroom by Glenn Davison
- American Kitefliers Association — How to Fly a Kite Online Guide
- Into The Wind Kites — Traditional Kites Reference Guide
- Prism Designs — Aurora Ribbon Tail, Ripstop Nylon Ribbon Tail, Infrared Tube Tail, and Sinewave Single-Line Parafoil Specifications
Frequently Asked Questions
Does a kite tail stabilize a kite by adding weight or drag?
In the American Kitefliers Association's How to Fly a Kite manual, tails stabilize kites in heavier winds by creating drag below and in-line with the kite (often attached at the bottom of the spine) to compensate for wind or design instability; the lighter the tail, the better because tails should add drag, not weight. In the American Kitefliers Association's Kites in the Classroom glossary, drag is the total air resistance during flight, a tail with a rough surface provides more drag, and a tail attaches to the trailing edge of a kite to add stability by creating drag (not by adding weight).
How long should a kite tail be on a single-line kite?
In the American Kitefliers Association's How to Fly a Kite manual, Launch Trouble-Shooting section, a kite may fail to rise if it has too much drag because of too much tail or a tail that is too heavy; for stronger winds, try a tail 7 times the length of the kite to start, and strips of plastic garbage bags work well when improvising. In the American Kitefliers Association's Kites in the Classroom manual, Kite Trouble Shooting section, depending on kite style, a tail as much as seven times the length of the kite may be needed; if a kite won't fly, verify that tails are centered at the bottom or equally placed on the sides.
What materials can you use when learning how to make a kite tail?
In the American Kitefliers Association's Kites in the Classroom materials guide, rolls of non-sticky plastic surveyor's tape (flagging tape) from hardware stores, crepe paper from party supply stores, and plastic trash bags are listed as materials for making kite sails and tails. In the American Kitefliers Association's How to Fly a Kite manual, possible kite tail configurations include thin, thick, multiple, u-shaped, balanced, Y-shaped, twisting, drogues, and combinations.
Where should you attach a tail on a delta kite or an airfoil kite?
In Into The Wind's traditional kites guide, for delta kites, if the delta pulls hard and loops or dives because the wind is too strong, adding tails makes it easier to launch and fly in gusty winds; add tails symmetrically at the center or equally to each side; don't attach tails to the keel. For airfoil and sled kites, attach your line to the bridle loop; bridle adjustment is not recommended with airfoils; instead, match the tail to the wind—a streamer can be fine in moderate winds, but you may need a drogue in strong winds.